Labels

Showing posts with label Holidays. Show all posts

Wednesday, April 16, 2014

Easter Egg Experiments and Red Cabbage Dye

It's almost here!!! Easter is my second favorite holiday next to Christmas. Easter is a celebration of our risen Lord who conquered death for our sins by rising out of death on the third day. The egg has been comparable to the Trinity of God, there are 3 parts to the egg; the yolk, the whites, and the shell. All 3 are different parts of the egg but all 3 are one together to make up the egg. The same is with our God; God the father, God the Son, and God the Holy Spirit. In many cultures (not just Christianity), the egg symbolizes rebirth and new life and painting and decorating them have gone back centuries. Historically, in Christianity they would paint the egg a deep blood red to represent the blood shed by Jesus on the cross. The tradition was carried throughout the years and variations were made of the way we decorate and paint them. So now that you have been given a brief history of the "Easter Egg," lets move on to the egg dye experiments!!
I looked up a few "dye recipes" using what I happened to have on hand (and tend to prefer) which was food coloring. I also mixed up a few of my own and experimented with color intensity. All the dyes require some white vinegar which helps "bind" the color so that it will stick better to the egg.
I had seen posts all over Pinterest about "natural dyes" using different foods and spices and one in particular had me all over wanting to try it and that was this gorgeous shade of blue that came from red cabbage. So I began to look more into it and to my disappointment, there wasn't much detailed instruction or tips on it. So I am going to do my best to maybe help anyone else who wanted a little more instruction on creating the beautiful blues you will soon see.

Things you will need:
spoons
plastic cups
hard boiled eggs
*For the food coloring dyes*
Food coloring (I used Target's brand)
Gel food coloring (optional for purple and hot pink or teal shades)
white vinegar
*For the Cabbage dye*
Salt (I used sea salt, but I'm not sure if that makes any difference good or bad)
1 Head of red cabbage
white vinegar
a pot for boiling the cabbage
mesh strainer
baking soda (optional)

Ok so to begin, I found its best to use disposable plastic cups to hold the egg baths, clear is best so you can see the dye. Here I mixed the dyes using food coloring and I made sure to write down the colors on each cup because its easy to mix them up otherwise. I measured 3/4 water in each cup and 1 Tbs of white vinegar and mixed in the drops of food coloring. To get a bright saturation of color, use more drops (I recommend at least 16-18).
This one was a "Jade" recipe using 17 drops of green and 3 drops of blue. This one was in there for a total of 6 minutes.
This was a "Spearmint" recipe using 12 drops of green, 7 drops of yellow, 3 drops of blue. As you can see, its almost identical to the last one with maybe only a tiny bit more green shade. Also 6 minutes.
This was an aqua/turquoise recipe that I used some teal GEL food coloring I had on hand and did a good squeeze and added like 5 more drops of blue. This was soaking for 6 minutes.
This was a recipe I was experimenting with. I was trying to go for a more robin's egg blue and used 15 drops of blue and 3 drops of yellow and this was soaking for 6 minutes. The longer they soak, the darker/more saturated the color will be on the egg. (Can you tell I like blues?)
I realized I had an ombre going, which i LOVED! these are the same green recipes but each egg soaked for a different amount of time. the lighter shades were in for about 4 minutes down to 3 or 2 minutes.
As you can see I had 2 purples in there. Purple dye is SUPER tricky to work with. It tends to look almost blue, and will even develop blue water spots. I just used solid purple dye on these (like a good hard squeeze of it) which was a gel food coloring. the darker purple was in there for a good 10 minutes and needed constant mixing and turning. The lighter shade was about 5 minutes.
My full batch of food coloring eggs! (Btw, I let my daughter do a HOT PINK egg but its not pictured. That is also tricky to work with and tends to settle if not constantly stirred. the more saturated and bright you want it, use LOTS of PINK GEL food coloring, and mix the egg and let sit a good 6 minutes or more. keep checking it until its the shade you desire.)

Aren't they pretty? :)

OK-so now the cabbage dye experiment!! Let me first warn you, boiling the cabbage is RANK!! I mean like grandpa farts mixed with baby diapers rank! So make sure you have the windows open to ventilate as much as possible, unless you enjoy that kind of smell lol. First up, when I looked up how to make the dye, when it came to the cabbage they said boil the whole head. They did not specify whether to chop it up or just throw in the whole head. I figured the dye would extract better if it was chopped up. So make sure you chop up the whole head into small chunks before throwing it in 2 quarts of water in the pot.


Bring to a boil and you can boil it from 30 minutes to an hour. I did 40 minutes. you will start to see the dye as you mix it occasionally and the water WILL reduce some but don't panic. After it has boiled, pour out the cabbage through a mesh strainer into a bowl. You will notice it has a purpleish violet almost fuchsia color. Add 4 TBS vinegar and 4 TBS salt and mix well.
This worried me at first, because I wanted BLUE eggs, not purple. So I researched a bit about turning the dye blue. They said according to the acidity of the food, you will have purple or blue dye and to turn it from purple to blue, all you need is a bit of baking soda. They said do add TINY amounts until you see it turn blue. I never took Chemistry in school because I never got a high enough grade from biology required to take it but I always was intrigued by it. Safe to say, I was VERY excited about all this lol. In fact, I was so excited I took a blurry picture when trying to catch the reaction of turning blue.
Can you see the blue in the foam? This was after adding just a pinch. I added pinch by pinch until the mixture turned completely blue. *TIP--before I changed the chemistry, I put aside a cup of the dye to experiment with. If you want the cornflower blue and best saturation, I suggest using the original dye without the added baking soda. You will see why in a minute.
This was after it turned pretty blue I was so excited!

Here you can see the difference from the original to the altered. Another interesting result, adding the baking soda created gas and caused the liquid to become more buoyant, causing the egg to float instead of sink like all the others did.
This was the result of the egg soaking in the BLUE mixture for ONE HOUR. as you can see, it hardly took to the dye. I read that to get best results its best to let soak overnight. So I did, and let me tell you, I was so disappointed!! It didn't change much from the picture above, and only changed a shade or two darker and after drying was very streaky.
This was the original cabbage dye and this was after only an Hour. It was saturating more and more evenly. I let this one soak for about 6 hours more and the result was beautiful!!
Isn't it gorgeous?? Something interesting I have learned is that as it completely dries, it seems to become more blue even though it looks more purple when you first take it out.
I tried soaking a few more, one overnight, one for about 4 hours, and another for about 9 hours.
The teal one was over night, the next deepest was 9 hours, the next lightest was the 6 hours and the lightest was 4.
The original cabbage dye (with no added baking soda) produced the BEST results. The longer the egg soaked, the more deeper the blue and saturation. And like I mentioned earlier, as the egg dries it turns more blue. So don't panic if they look purple after immediately removing them from the bath.
Since I fell so in love with these results, I wanted to have eggs I could keep forever so something you can do is soak a RAW egg and after it completely dries, blow out the egg ( I used this method ) and you can keep them forever! :)
I had SO MUCH fun doing these and I hope you do as well! Have you ever used any of these methods? I would love to hear your results in the comments below or any tips or tricks you may have. If you try this method please let me know how it turned out for you!
I hope you have a BLESSED Easter and remember what it's really about! Praise The Lord for His victory and His incredible sacrifice! God Bless! <3

**Extra tips**
-The dyes do tend to stain fingers and clothes so you may want to wear an apron to protect your clothing (I did) and/or gloves to protect your hands.
-If you want the blue hues from the cabbage dye, DO NOT ADD the baking soda, but if you would like to just see the experiment of it pour aside an extra cup and you can see it transform first hand. It would also be a fun experiment for kids to see as well.
-I would occasionally stir the eggs in the baths just to coat more evenly and make sure the egg is completely in the bath with no parts exposed, you can use a metal spoon to help it stay in if that's the case.
-You may want to protect table surfaces as well by putting an old towel or tablecloth down.


Tuesday, December 31, 2013

Peace out, 2013!!!

It has arrived! New Year's Eve; the one holiday that gives you a fresh start. What's this mama doing?? Pshh.. I'm putting on my finest PJ's, fuzzy socks, having a movie marathon and pretending for the last time that I can eat however I want! Don't be jealous! This year was rough for me, to say the least. It has been filled with many trials and struggles as a mother especially. So, I would be lying if I said I was "sad" to see 2013 go.. NOPE! Be gone 2013!!!! lol
So we do it every year...the infamous "new year's resolutions." We are motivated, going to lose those 15 lbs, and then by about May, we have completely forgotten or abandoned our resolution(s) all together. Yes, I am quite guilty of this. BUT, since I am blogging my resolutions, I have no excuse; I will forever have them in front of me where I cannot lose them and I will have all year to work on them. I never have just ONE resolution, and I aim to make them lifetime resolutions, not just for the new year, but at least making it through one year is a small step.  I have a total of 2 "followers" on this blog, and I don't expect anyone else to actually take the time to read through it but if my resolutions help to motivate anyone else beside myself, that would be AMAZING! So behold, I give you my 2014 resolutions!!

1. Do more/be more involved with my family--Turning off the electronics, going on walks together, having game nights, doing crafts, as long as we are spending quality time.

2. Never miss a day of devotions, personal or with the family--for those who may not know, "devotions" are time spent with the Lord in Bible study, prayer, meditation and worship. This requires extra discipline on my side, there are days where I get so busy and make excuses..there are no excuses, I MUST do them!

3. Be healthier--of course that includes losing weight for me but I also mean no more JUNK. Not just food, but junk tv, junk sites, junk anything! Healthy physically, mentally, AND spiritually!

4. Don't sweat the small stuff--sometimes we try so hard to be in control, but God is in ULTIMATE control! When something doesn't go our way, or according to our plans or wishes, we have meltdowns and hissy fits. It's not the end of the world if my house is a mess for one day, it's not the end of the world if the kids are fussing, it's not the end of the world if no one comments on my blog or social media-No. Big. Deal.

5. Be more patient/loving--this is especially true for me as a mother. I have allowed myself to lose my temper too often and have not shown my children love by example. I have a best friend (love you Britt!) who gives me a hard dose of TRUTH in love and is constantly reminding me of this when I cry to her about my kids.

6. Get our finances in order--we have a plan this year, we NEED to see it through!!!

7. Have at least ONE date with my husband every month--this doesn't mean we have to spend money or go out. We can do it at home after the kids are in bed, we can go for a walk, whatever it takes.

8. Get a new tattoo--I decided that any tattoo I get will be honoring to my faith, and I have a really good one in mind for my number 2!!!

9. Be mindful of social media--it can be both a blessing and a curse. I have lost friendships over things I post on my OWN page. Someone out there will always disagree with your opinions or views, and most of them choose to cause drama, if not careful, we end up opening a can of worms and doing more damage than we set out to. I plan to get on once in a great while, manage what I need, and get off. otherwise, we can spend hours and getting sucked into what we don't need.

10. LAUGH MORE--pretty self explanatory. Just need to enjoy every day more, find the happiness and live it!

So there you have it! I will be held especially accountable, at times I'm sure I will fail, but the thing is to keep going! Get up and dust yourself off and try again! HAPPY NEW YEAR to you all! May you have a blessed year and a safe one! God bless!
                                                                       Love,
                                                                          Lisette 
                                                                      

Saturday, December 14, 2013

Dear Mary...

"Mary did you know that your baby boy would some day walk on water?
Mary did you know that your baby boy would save our sons and daughters?
Did you know that your baby boy has come to make you new?
This child that you've delivered, will soon deliver you.

Mary did you know that your baby boy would give sight to a blind man?
Mary did you know that your baby boy would calm a storm with his hand?
Did you know that your baby boy has walked where angels trod?
And when your kiss your little baby, you have kissed the face of God."


Dear Mary,
2013 years ago, you were approached by an Angel of the Lord who told you that you would bear the Son of God, as a virgin, chosen by God Himself. You were so young, were you afraid? All the emotions you must have experienced at that moment, the fear, the uncertainty, the excitement? Of all the people on the planet at that time, you and you alone would bear God in your womb. As your belly grew, what was it like? The connection of feeling this most important miracle move inside your body. God watched over you and protected you, Mary. You could have easily been stoned to death when the people saw that you were pregnant before marriage, but you weren't. He kept you safe and healthy until that most fateful day. As you felt ready to give birth to God, were you afraid? Knowing you were running out of time and still had not found shelter? But you did.

"So it was, that while they were there, the days were completed for her to be delivered. And she brought forth her firstborn Son, and wrapped Him in swaddling cloths, and laid Him in a manger, because there was no room for them at the inn." Luke 2:6-7

As you watched your Son grow, He must have been the most joyous child and the most helpful one! For 30 years, your Son, the Son of man, the only perfect being to have ever walked this planet, lived with you and you beheld Him. What was it like? Was He funny? Was He sweet? I'm sure you never had to ask if He was telling the truth, because you heard truth itself whenever He spoke. He must have been the most incredible and fulfilling thing to have ever happened in your life! When you asked Him to do something, He must have done it with beyond perfection! When He had to leave home for His ministry, it must have been so hard for you to see Him leave you after having Him by your side for so many beautiful years. Were you proud, Mary? When word reached your ears about His healing the lame, the lepers, the blind, the sick, even the dead? Were you surprised at all that your Son was walking on water and calming storms? You knew time was drawing near, you heard Him speak about it many times. I would have hoped and prayed that there was some other way, but you were a servant of God and trusted Him.

The day arrived; that most terrible day for you to have witnessed, for any mother to have to witness. How your heart must have been bleeding inside as you watched your sweet and innocent child being beaten, shamed, flesh being torn from his raw wounds. How were you able to bear it? As a mother myself, I could hardly allow the faintest of thoughts about my children being hurt without tears burning my eyes and pain in my heart.. but you chose to stay and see, He must have felt comfort knowing you were there, His mother. You must have been overwhelmed and overjoyed when at last He rose and defeated death and sin itself! Did you know the impact His death and resurrection would have 2013 years later?? He has changed my life, Mary. I have accepted Him as my beautiful Savior. I know that you are in blissful paradise now by His side  forevermore. I wanted to thank you, Mary. Thank you for obeying God and carrying this miracle. Thank you for raising Him and loving and caring for Him. Thank you for allowing Him to die for my sins.

                                                              Yours Truly,
                                                             Lisette Lopez

Thursday, December 5, 2013

A touch of Christmas; Decorating Lisette Style

IT'S HERE!!!! The most wonderful time of the year!! Like fall, I couldn't wait to put up my stuff like I usually do the day after Thanksgiving. I did two weeks early. Every year, I add just a little bit more or change just a little bit here and there as far as what I put up or make. When it comes to the holidays, I tend to veer away from traditional colors and find a way to always incorporate my favorite shades of course. So the question is, what is my Christmas decorating style? Is it beachy? Is it rustic? Is it whimsical? Is it shabby chic, or vintage-inspired? I really couldn't peg it down to any single one. I think it's very me, which seems to satisfy everyone else in the house. So BEHOLD! I give you Christmas-Lisette style! (warning-there will be LOTS of pics)


My mantle. My newest addition is the mercury glass owl and the amazing string art by Thread therapy. Oh and a few feathers in a blue mason jar never hurt anyone ;) I made the stockings two years ago out of felt and added little clusters of buttons in the top corner of them. The sign I recently made with a homemade turquoise stain and silhouetted letters and nativity modpodged on with the shelter being made of burlap. the window shutter is our newest Advent calendar!

The entry way table. The basket is filled with fresh pine clippings from my backyard and I threw in a few pine cones and cedar roses.
The Nativity-we are missing one wise man thanks to my daughter who decided these were fun to play with last year. We got these as a wedding gift 9 years ago and have stuck with them since.
This is a wreath we got years ago and I hang it on the interior side of the front door.
I made this wreath two years ago as well-just a Styrofoam ring wrapped in yarn and the "merry Christmas" is made out of jute string. And of course throw in a couple seashells, burlap and felt roses and voila!
I saw a tutorial on making cone trees out of cereal boxes. I downloaded the templet for them and had fun using materials I had on hand to finally have little cone trees!
After I started having kids, it wasn't very practical having glass ornaments anymore. Being on a tight budget, I got creative in finding ways to replace just about all of the fragile ones with handmade ones, I even recycled some of the old glass ones by wrapping them in yarn or jute-making them unbreakable.


I had an old King James Bible that we never used and it had some water damage, so I took out the pages with the Christmas story from Luke 2 and mod-podged them onto old glass ornaments.
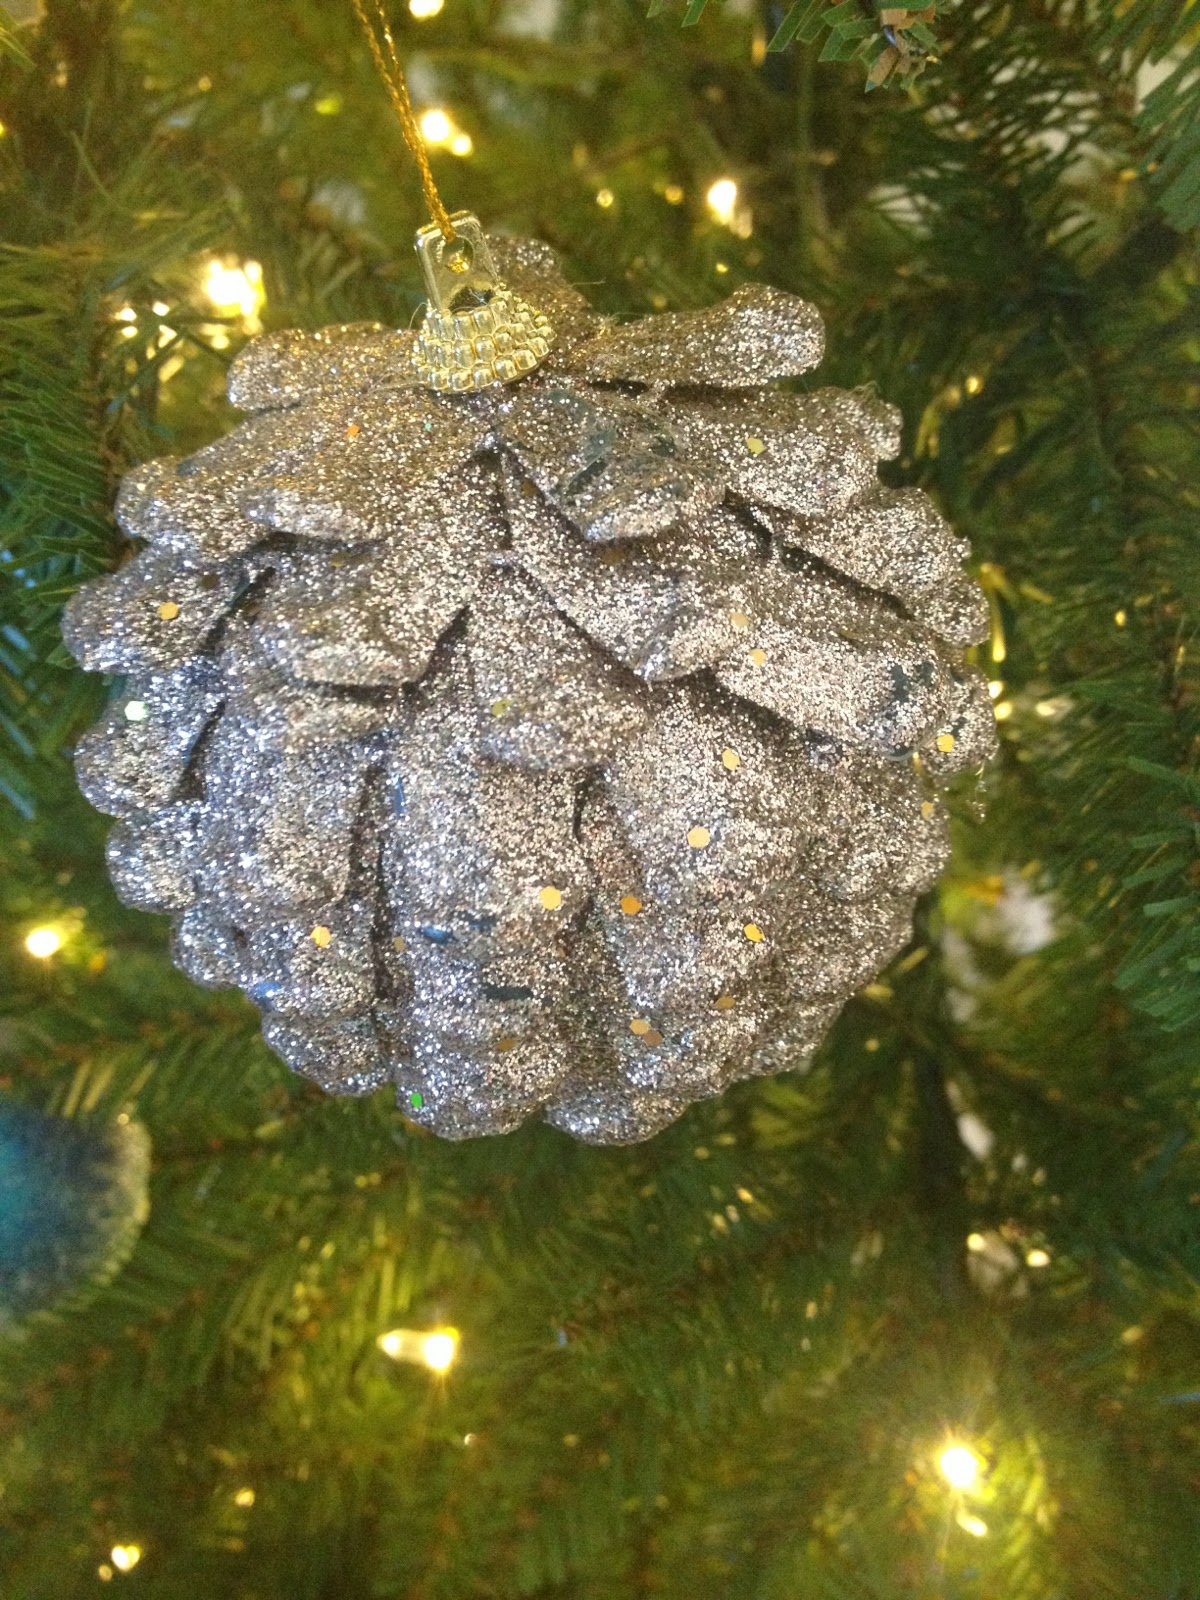
Every year, I make it a point to buy at least one new ornament for the tree. Last year it was the white owl, this year it was this mercury glass vintage key via Threshold at Target, and the glittery pine cone was from Hobby Lobby.


Here's the tree!


What better way to end a day of decorating than a cup of hot cocoa! The rainbow marshmellows were just a bonus ;)
This was an amazing sunset after putting up the outside decor. God is the ultimate artist! <3
The lights we got last year are LED and these change into an array of different vibrant colors! We LOVE them!

What is your Christmas style? Whatever you like, use it! Make it your own and don't worry about "rules" or "perfection." And the most important thing is to remember to keep CHRIST in Christmas!!

"For unto us a child is born..." Isaiah 9:6


Thursday, August 22, 2013

Pumpkins and Owls

It's no secret that I love owls. They have become increasingly popular over recent years and can be easily found in all kinds of stores and decor. Owls used to be used as scary Halloween decor once upon a sad time, but now have a nice place among fall decor without being ghoulish or creepy. I have included some of my owls in my fall decorating and they fit right in! So in my last blog post you saw a peek at some of my decor, some of them being pumpkins. Pumpkins are my most favorite thing about fall!! The options with them are endless when it comes to decorating them and I had a large blank white one that I couldn't decide what to do with at the time. Enter good ol' trusty Pinterest. After lots of great ideas, this was my favorite!
Cute isn't it?? Owl pumpkins made with a large white pumpkin (real or craft), and some sunflower seeds!! Supplies needed: a large white pumpkin, sunflower seeds, a hot glue gun, and a craft/utility/pumpkin-carving knife.
There are a couple ways to carve into these bad boys, my pumpkin was a craft one, and therefore already hallow and made of foam. If you have a real one, you have to do the drill of opening a gutting out the pumpkin, same way you would be prepping for any jack-o-lantern. I assume the easiest way to do this would be using the drill gun with a large drill bit to make the holes for the eyes, but our drill gun hates me and decided to kill over as soon as I touched it. So I used a serrated steak knife (not the most appropriate or sophisticated tool for the occasion but it gets the job done and it's all I had on hand).
Since my drill committed suicide, I carved out the holes by hand, once I had the general hole I twisted the knife around to scrape it evenly. Next step is carving the "beak" by carving out a simple upside-down triangle.
Now the fun part, start hot-gluing the seeds with the fatter sides around the outside of the eye holes. The original Pinterest picture showed two rows of the seeds, to which I tried just two but ended up fulling in the gaps probably more than I should have.
When you are satisfied with how it looks, do the same for the next eye and try to make it as even looking as possible.
Last step is the ear tufts on top of the pumpkin on the upper outer corners of the eyes. I failed to take photos of this step because I got side-tracked with my kids begging for me to feed them, I'm sorry :( But its pretty simple, use two seeds as the base placing them in a "V" shape and put a huge glop of hot glue directly onto the pumpkin and stick the seeds on and hold for a few seconds until the glue is hard enough to hold the seeds without assistance. Repeat the step with two more seeds on top of the first row, then top it off with a single seed placed in the middle of the "V" on top.
For the "claws," just hot glue a group of 3 seeds (2 pointing outward in an upside down "v" and a single seed in the middle of the "v" also pointing down).


Here is my finished product! Since this is a craft pumpkin, I'm pretty sure I can't use a real flame candle on the inside to light it up, so I used a cheapie LED tea-light candle that sadly is supposed to be lighting it up in the photo, but that's as bright as it could get. So I would recommend a better, stronger LED tea-light to illuminate this guy. Do you have any creative ideas for decorating pumpkins in unusual ways? I would love to hear some of your ideas in the comments below!